Easy and Delicious Baked Chicken Breasts

Serves 4

I've always found baking chicken breasts in the oven to be a little tricky.  They would either come out dry, rubbery, tough or flavorless.  But all that has changed since I tried this easy, absolutely foolproof recipe from Gimmesomeoven.com for making juicy, tender chicken breasts that taste unbelievably delicious!  You can even make an extra-large batch and freeze the leftovers for future use! 

Ingredients:

  • 4 organic boneless skinless chicken breasts, which have been pounded to even thickness and brined in saltwater (*super important step, see easy instructions below)
  • 1-2 tablespoons of organic grass-fed melted butter ghee or olive oil (I prefer using ghee or butter as it gives great flavor and helps give a nice crust on the outside.  
  • 1 teaspoon kosher or sea salt
  • ½ teaspoon fresh black pepper
  • ½ teaspoon garlic powder
  • ½ teaspoon paprika
  • Chopped basil, parsley or cilantro as garnish (optional)

Preparation:

  • To brine your chicken breasts, simply fill a large bowl with 1 quart (or enough water to cover the chicken) and ¼ cup kosher or sea salt.  Stir to combine until most of the salt is absorbed.  Add the chicken breasts and let them sit in the mixture for 15 minutes.  Or if you have the time you can also cover the bowl and refrigerate for up to 6 hours.  
  • Remove the chicken breasts from the brine, rinse them with cold water and then pat them dry with paper towels. (Some store-bought chicken breasts are now sold pre-brined.  So double-check your packaging before doing this step.  If it has already been pre-brined in a sodium solution you can skip this step.
  • Preheat oven to 450 degrees F.
  • Place the chicken breasts in a single layer in a large baking dish.  Brush on both sides with melted butter, ghee or oil.
  • In a separate small bowl, whisk the salt, pepper, garlic powder and paprika until combined.  Then sprinkle the mixture evenly over the chicken on both sides. 
  • Bake for 15-18 minutes, or until the chicken is cooked through and no longer pink.  If you use a cooking thermometer, measure the temperature at the thickest part of the breast; it should be at least 165 degrees F.
  • Or if you want the chicken to be a little bit browned and crispier on top, you can broil the chicken on high for the final 3-5 minutes, keeping a close eye on the chicken so that it does not overcook and/or burn.
  • Once the chicken is cooked, remove from oven, top with chopped, basil, parsley or cilantro (optional) and loosely tent a sheet of aluminum foil over the pan to keep the heat in while the chicken rests for at least 10 minutes.
  • Serve and enjoy your perfectly cooked chicken breasts!
  • Refrigerate leftovers in a sealed container for up to 3 days, or freeze for up to 3 months.
Healthy and Delicious Rice Pudding

Makes 4 servings

This version of brown rice pudding makes for a delicious and healthy treat.  Rich and creamy and made with just 5 ingredients - no preservatives, artificial flavors and colors.  Not only is this the perfect comfort food, but the brown rice also gives you the added benefits of fiber, selenium, manganese and anti-oxidants - all which help to prevent damage to your body!  Not only will you love it, but even your kiddies will be so happy to have this treat as an after school snack!

Ingredients:

  • 1 cup organic short grain brown rice (cleaned, see below for instructions)
  • 3 cups almond or other nut milk of choice + 1 another cup
  • 1 teaspoon vanilla
  • 1 teaspoon cinnamon
  • 2-3 tablespoons organic coconut sugar
  • Chopped walnuts, almonds, pumpkin seeds, strawberries, blueberries or any other topping you like (optional)

Preparation:

  • If you have the time, soak your rice in a container with double the amount of water for anywhere between 8-24 hours.  Drain in a colander and then rinse under running water and drain again.  Or for a fast wash you can put the rice into a pot and rinse well until the rinsing water runs clear.
  • Next, bring 1 cup of rice, 3 cups of milk, coconut sugar, vanilla and cinnamon to a rolling boil.
  • Turn to low, cover and let simmer until all liquid has absorbed which will take anywhere from 45 to 60 minutes.  
  • Finally add additional cup of milk, sprinkle with a dash of cinnamon and add toppings if desired!
  • Enjoy!
  • Store leftovers in glass containers (I like to use small glass mason jars) in the refrigerator.

Salted Caramel Dark Chocolate Matzo Bark

Makes 4 sheets

Light and crispy matzo topped with salted date caramel and dark chocolate makes for a delicious and healthier treat on Passover!  Recipe is a slightly adapted version from Making Thyme For Health.  You can view the original recipe here.

Ingredients:

  • 4 sheets matzo (I used gluten-free but you can use whatever kind of matzo you prefer)
  • 15 Mejdool dates, pitted
  • 12 ounces dark chocolate
  • 1-2 tablespoons coconut oil
  • Juice of 1 lemon
  • Pinch of sea salt
  • Desired toppings such as pistachios, craisins, almonds, sea salt, etc.

Preparation:

  • Begin making the date caramel by covering the dates with a few inches of water in a small saucepan over medium heat.  Bring to boil and then remove from heat and set aside until dates are soft, about 5 minutes.  Transfer to a blender or food processor along with the lemon juice, salt and 5 tablespoons of the date cooking water.  Blend on high until smooth.  Add more water if needed.  You may also need to stir it by hand in between blending to get it smooth.
  • Next, put chocolate and coconut oil into another small saucepan over low heat and stir continuously until it is entirely melted and smooth.  Let sit over a low heat.
  • Place matzo sheets on baking sheets without overlapping them.  Spread date caramel on top of each matzo sheet.  Then pour the chocolate on top and spread toward the edges using the back of a spoon.  Sprinkle with desired toppings then transfer the baking sheets to the freezer and allow to set for at least 20 minutes.
  • Break each sheet into separate pieces and serve or store in an airtight container or Ziploc bag in the refrigerator until ready to eat.

Enjoy!!!

Good Morning Bowl of Pure Yumminess

Makes 1 serving

This rainbow yogurt bowl fills all of your morning needs by providing protein and essential nutrients from the yogurt and fruit, while also keeping you satiated with healthy grains like flax, chia, hempseed and granola.  Have your family assemble their own by setting up a yogurt bar where they can add whichever toppings they want to their own bowl!

Ingredients:

  • 1 cup Wallaby organic plain unsweetened Greek yogurt
  • 3 cup cut up strawberries
  • 2-3 orange slices, cut up
  • ¼ banana cut into slices
  • ½ kiwi, cut up
  • ¼ cup blueberries
  • 1 tablespoon unsweetened coconut chips
  • 1 tablespoon ground flaxseed
  • 1 tablespoon chia seeds
  • 1 tablespoon hemp seeds
  • 1 tablespoon granola
  • 1 teaspoon honey (optional)


Preparation:

  • Fill a small bowl with 1 cup of yogurt.
  • Place fruit around sides.
  • Put seeds and granola in the middle.
  • Drizzle honey over the bowl.
  • Enjoy!

Penne a la Delicious

Serves 4

When you’re craving Mac and Cheese but want to keep it healthy, try this deliciously decadent version of the ultimate comfort food.  This recipe is the perfect combo of rich and creamy while having a whopping 14 grams of protein and 7 grams of fiber per serving.  Made with super nutrient dense ingredients like cashew milk, cauliflower and green lentil pasta, and so simple to make, this is bound to become one of your favorites! 

Ingredients:

  • ½ head cauliflower, cut into pieces
  • 2 tablespoons coconut or avocado oil
  • ¼ cup raw cashews
  • ¼ cup nutritional yeast
  • 2 teaspoon Dijon mustard
  • 1 teaspoon fresh lemon juice
  • 1 clove garlic, minced
  • ¼ teaspoon sea salt
  • ¼ teaspoon black pepper
  • 1/8 teaspoon turmeric
  • 1/8 teaspoon chili powder
  • 1 box Ancient Harvest POW! Green Lentil Penne 


Preparation:

  • Put raw cashews in a small bowl, cover with boiling water and leave for at least 2 hours.  Drain cashews and put in high-speed blender with 1 1/5 cups of water.  Blend and Voila! – You just made cashew milk! 
  • Preheat oven to 400 degrees.  Toss cauliflower with melted coconut or avocado oil, season generously with salt and pepper and roast until it starts to brown and soften, about 20-30 minutes.
  • Cook pasta according to directions on the box.
  • Strain pasta but reserve 1 cup of cooking water and set it aside.  Use the warm empty pot to mix together 1 cup cashew milk, nutritional yeast, mustard, lemon juice, garlic, ¼ tsp. each of salt and pepper, turmeric and chili powder.  
  • Remove cauliflower from oven and put it in the blender on low or food processor for 10 seconds to chop it and add it to the pot.  You can also cut the cauliflower into smaller pieces with a knife. 
  • Put ¾ of the cauliflower in the pot and mix with the sauce.  Leave the rest of the cauliflower to top the pasta with at the end. 
  • Add the strained pasta back to the pot.  As you stir, slowly add about ¼ of the reserved cooking water to the pot.  This will thicken the sauce.  Keep adding the cooking water until it reaches a creamy consistency.  Taste, add more salt or pepper if you desire.
  • Plate the pasta and garnish with the roasted cauliflower.
  • Sprinkle with hot red pepper flakes.
  • Serve immediately and enjoy!

Mulberry Street Sautéed Calamari

Serves 4

I love calamari and this dish is probably my all time favorite!  It’s made with nothing but fresh, healthy ingredients and it’s absolutely delicious!  I like to serve it with a kale salad or sautéed veggies on the side.  You can also serve it over a high fiber pasta like 100% whole wheat, chickpea, lentil, quinoa or buckwheat.  My husband named this dish because he says it’s just like one you’d find on Mulberry Street in 1984. 

Ingredients:

  • 4 lbs. of fresh and cleaned Calamari 
  • 4 Cloves of Organic Garlic
  • 1 Bottle of white cooking wine that cooks well with a seafood sauce (ask for suggestion at any wine or liquor store)
  • 1 heaping tablespoon Coconut Oil
  • Salt 
  • Fresh Pepper
  • Chili Flakes
  • Rao’s Marinara Sauce
  • Chopped Basil (optional)

Preparation: 

  • Cut the Calamari in ringlet size pieces (1/4-1/2 inch thick)
  • Cut the garlic in thin slices.
  • Put heaping tablespoon of coconut oil in a very large, deep sauté         pan over medium heat.
  • When oil has coated the pan, add garlic and sauté until turning fragrant and turning lightly brown, about 2-3 minutes.
  • Cut the garlic in thin slices.
  • Put heaping tablespoon of coconut oil in a very large, deep sauté pan.
  • Once oil has melted, add garlic to the pan and sauté until fragrant and turning lightly brown.
  • Add the calamari to the pan and turn heat to high.
  • Immediately add ¾ of the bottle of wine in the pan.  Add a pinch of salt.
  • Add fresh pepper to taste.
  • Add red pepper flakes (more the better).
  • Stirring occasionally, let cook until all the wine has evaporated, about 50 min.  Once all the liquid has cooked off, turn heat to low. 
  • In a separate small saucepan, add ½ jar of Rao’s Marinara Sauce until hot.  Once marinara sauce is hot, add it to the cooked calamari.  Stir together on high simmer for 5-10 minutes.
  • Garnish with chopped basil (optional).
  • Serve and enjoy!

Roasted Root Veggie Chips

Serves 4

Satisfy that craving for something crispy with homemade, healthy, delicious veggie chips! My family couldn’t eat these fast enough!  I used golden beets, purple potatoes, sweet potatoes and celery root.  With a little bit of salt and good quality oil like extra virgin olive oil or coconut oil you can turn any firm, flavorful tuber or root veggie into a delicious salty chip that your family won’t be able to resist!

Ingredients:

Preparation:

  • Preheat oven to 400 degrees.
  • Peel celery root and beets.  Wash the potatoes but you can leave the skin on.
  • Slice all the veggies as thinly as possible (I used a mandoline) about 1/16 inch thick.
  • Place a wire cooling rack over a rimmed baking sheet; lightly mist rack with olive oil or coconut oil cooking spray.
  • Lay vegetable slices on rack as close together as possible without overlapping.  Spray lightly with olive oil and season with salt.
  • Bake for 10 minutes and then flip slices and bake for another 10 minutes.  Continue baking slices in 3-5 minute intervals, removing slices that are turning golden and beginning to crisp (vegetables will crisp further as they cool).   Continue until all slices are done.
  • Sprinkle with parsley (optional) and enjoy!

Chicken Stir-Fry

Serves 4

Everyone should have a solid chicken-and-veggie stir-fry recipe in his or her back pocket, and this one is my go-to.  Stir-fry is a great way to get in a ton of veggies and lean protein into a meal. Feel free to do shrimp, tofu or beef instead of chicken or swap out any of the veggies for others that you prefer!

Ingredients:

  • 1 tablespoon ginger juice
  • 1 tablespoon tamari (I use gluten-free)
  • 1 tablespoon coconut aminos
  • ½ cup brown rice vinegar
  • ½ cup toasted sesame oil
  • ¼ cup fresh cilantro, chopped
  • 2 garlic cloves, minced
  • 3 skinless chicken breasts cut into cubes
  • 3-4 tablespoons peanut oil
  • 1 onion, cut into crescents
  • ½ cup carrot, thinly sliced
  • ¼ cup bell pepper, sliced
  • 1 cup purple cabbage, sliced
  • 1 cup bok choy, sliced
  • 1/2 cup broccoli, cut into florets
  • ¼ cup toasted sesame seeds
  • salt and pepper to taste

Preparation:

-For the marinade, whisk the following ingredients together: 

  • 1 tablespoon ginger juice
  • 1 tablespoon tamari
  • 1 tablespoon coconut aminos
  • ½ cup brown rice vinegar
  • ½ cup toasted sesame oil
  • 1/3 cup fresh cilantro, chopped
  • 2 garlic cloves, minced
  • After everything is mixed, divide the marinade equally into 2 different bowls and set aside.


  • Marinate chicken in ½ of the marinade for at least 30 minutes, or overnight in the refrigerator.
  • Toast sesame seeds in dry skillet over medium-low heat, stirring occasionally, for 2-3 minutes or until the seeds turn brown, glisten and occasionally pop or jump.  Remove seeds and set aside.
  • Heat 1-2 tablespoons peanut oil in the same skillet over medium-high heat.  Add chicken and cook for about 6-8 minutes, or until cooked through.
  • Remove chicken from skillet and set aside.
  • Put broccoli in skillet and sauté for 5-7 min, until just softened.  Turn off heat and set skillet aside.
  • Coat another skillet with 1-2 tablespoons of peanut oil and cook onion and carrot over medium heat until tender.
  • Add cabbage, season with salt and pepper, toss, cover and cook for 3 min.
  • Add the rest of the marinade to the skillet and toss.
  • Add the broccoli and chicken to skillet.  Season with a little toasted sesame oil, salt and pepper to taste.
  • Sprinkle toasted sesame seeds and serve on top of quinoa or brown rice. Enjoy!

Banana Mango Superfood Smoothie

Makes 1-2 servings

Get some green into your diet by starting your day on the right foot with this creamy, sweet, bright and refreshing superfood-packed green smoothie.  The banana and mango create a rich, creamy base, while the spinach, almond milk, ginger and peanut butter balance them out.  This smoothie is packed with fiber, healthy fats and protein and will lay a great foundation for your day by keeping you satisfied for hours!

Ingredients:

Preparation:

  • Add all smoothie ingredients to high-powered blender and blend until creamy and smooth. 
  • Enjoy! 

Sautéed Asparagus, Shitake Mushrooms, Arugula and Spinach

Makes about 2 servings

This is one of my favorite sautéed vegetable medleys to make as a side dish to any entrée.  It’s delicious, packed with vitamins, minerals, antioxidants and takes no time to make. You can easily replace a vegetable here and there, too, if you prefer another one or don’t happen to have one of these on hand.

Ingredients:

Preparation:

  • Heat 1 tablespoon coconut oil, ghee or grass-fed butter in a large skillet over medium-high heat.  
  • Cook and stir asparagus until just tender about 3 minutes.  Season with salt and pepper.
  • Add mushrooms and sauté for another 3-4 minutes.  Add in the Coconut Aminos and stir.
  • Add spinach and arugula to skillet and sauté until wilted and other vegetables are starting to turn a golden brown, about 5-7 more minutes.  Taste and if needed add more salt and pepper to taste.
  • Remove from skillet and top with Eden Shake Sesame and Sea Vegetable Seasoning.
  • Enjoy!

Easy Gluten-Free Blueberry Muffins

Makes 15-18 muffins

My family loves a blueberry muffin.  They eat them for breakfast, as an afternoon snack and even for a post dinner treat, so I make sure I make muffins that are healthy enough for breakfast and sweet enough for dessert.  I made these on a snowed-in day when I didn’t have all the ingredients to make my usual blueberry chia seed muffins and they came out light, fluffy and absolutely delicious!  They are a slightly adapted version of Dr. Axe’s Gluten-Free Blueberry muffins.  They’re made with only a few simple ingredients and couldn’t be easier to make! You can view the original recipe here: 
https://draxe.com/recipe/gluten-free-blueberry-muffins/

Ingredients:

  • 4 cups almond flour
  • 6 eggs
  • 1/2-cup honey
  • 1-teaspoon vanilla extract
  • 1 teaspoon baking soda
  • 3 teaspoons baking powder
  • 2 teaspoons cinnamon
  • Pinch of sea salt
  • 10 tablespoons coconut oil or ghee, melted
  • 2 cups blueberries (fresh or frozen)

Preparation:

  • Preheat oven to 350 degrees.
  • In a small saucepan over low-med heat melt the coconut oil or ghee and then allow it to cool for a few minutes.
  • Meanwhile in a medium bowl mix the almond flour, baking soda, baking powder, sea salt and cinnamon.
  • In another bowl, combine the eggs, honey, vanilla and melted coconut oil or ghee. 
  • Pour wet ingredients into the dry and mix well.  Stir the blueberries into the mixture.
  • Spoon batter into muffin tins or silicon cups and bake for 25-30 min.  Edges should be just turning brown and firm to the touch. 
  • Let cool and enjoy!  
  • Store in the refrigerator or freezer and pop in the toaster to warm up for a delicious and healthy breakfast or anytime snack!

Detoxing Vegetable Soup

Serves 4

On snowy days nothing will warm you up after a morning of building snowmen quite like a hot bowl of soup.  This was made with whatever veggies I had in the house and it turned out so good I couldn’t wait to share this super easy-to-make, vitamin-rich, fiber-filled delicious recipe.  Freeze leftovers in glass mason jars in serving sized portions for a quick meal. 

Ingredients:

  • 1 large leek, cleaned and thinly sliced
  • 1 large carrot, chopped
  • 2 garlic cloves, minced
  • 2 zucchini, chopped
  • 3 cups broccoli, cut into florets
  • 3 cups cauliflower, cut into florets
  • 4 cups vegetable broth
  • 2 large handfuls of spinach
  • 1/3 cup almond milk
  • Himalayan sea salt
  • Freshly ground black pepper
  • Chopped parsley for garnish (optional)
  • 1/8 cup olive oil
  • 2 tablespoons coconut oil

Preparation: 

  • Preheat oven to 400 degrees.
  • Melt coconut oil in small saucepan.  Toss cauliflower with oil in a bowl and season with salt and pepper.  Place cauliflower on baking sheet and roast for about 25-30 minutes or until slightly browned.
  • Heat a large 4 or 6 quart Dutch oven over medium heat and add the olive oil.  When it shimmers, add the leek, carrot, and a few pinches of salt.  Sauté for 7-10 minutes, until softened. 
  • Add the garlic and sauté for one minute.  Next, add the broccoli and zucchini, and pour in enough vegetable broth to cover the veggies.  Bring the soup to a boil, reduce the heat, and simmer until the vegetables are just cooked through, about 10 minutes.
  • Add the roasted cauliflower to the pot and after a few minutes remove the pot from the heat.  
  • Add the spinach and using an immersion blender, puree the soup until it’s smooth.  
  • Finally stir in the almond milk, warm soup on low heat, and season with salt and pepper to taste.  
  • Garnish with parsley (optional) and enjoy!

*  You can also use a regular blender but be careful because hot liquid expands when blended and can cause it to explode all over the place.  To puree in the blender, without an explosion:  remove the cap or stopper from the lid of the blender.  Fill blender no more than halfway with soup.  Place the lid on the blender and cover the hole with a towel, holding it in place with your hand.  Start the blender on low to get it going and slowly lift up the towel to let some of the steam escape.  After it starts to puree you can slowly turn the power up to reach your desired consistency.  Then pour the soup back into the pot and add the almond milk.

Chickpea Pasta with Basil Pesto

Serves 4

This is another winning recipe in my house - which for me means that I make my entire family the same thing for dinner and everyone eats it! Pesto is a delicious way to pack nutrition into any meal, especially pasta.  It’s filled with good-for-you ingredients and disease-preventing antioxidants such as vitamins A and C, and it’s rich in heart healthy mono and polyunsaturated fats thanks to nuts and olive oil. Chickpea pasta is super high in protein, but if you want to add more, this is a great dish to throw in some grilled chicken or sausage.

Ingredients:

  • 2 cups fresh Basil, big stems discarded, rinsed and dried
  • 1-2 Garlic cloves, crushed
  • 3 tablespoons Pine nuts or Walnuts, lightly toasted in a dry skillet
  • ½ cup Extra Virgin Olive Oil, or more
  • ½ cup freshly grated Parmesan Cheese (optional)
  • Salt and Pepper to taste
  • 1-2 boxes of Banza Chickpea Pasta

Preparation:

  • Prepare a pot with 4 quarts of water.  Add a tablespoon of salt.  Bring water to rapid bowl over high heat and stir pasta into boiling water.  Stir periodically to keep from sticking and remove from heat just as the pasta is slightly undercooked.  Before draining pasta, reserve about ½ - 3/4 cup of the reserved water, set aside, then drain the pasta and pour it back into the pot.
  • In a food processor, combine the basil, garlic, nuts and about half the oil in a food processor or blender.
  • Process, stopping to scrape down the sides of the container occasionally, and add the rest of the oil gradually.
  • If you prefer a thinner pesto, add additional oil.
  • Next, add about half of the reserved water into the pasta and then add the pesto.   Turn heat on low and mix until thoroughly coated. If you want the sauce thicker, add a little more of the reserved water.
  • Finally stir in the Parmesan cheese just before serving.
  • Enjoy!

Shrimp & Quinoa Paella

Serves 4

An easy, all in one pan recipe for delicious Paella that’s made healthier with quinoa instead of rice.  I like using quinoa because of its numerous health benefits.  Quinoa beats rice with its impressively high fiber, protein and iron content as well as many other nutrients.  It cooks the same way as rice: 1 cup quinoa + 2 cups liquid.  It’s a great substitute in paella as it gets infused with all the different ingredient flavors.  In terms of seafood, you can use whatever you like.  If you’re not a seafood fan, feel free to use meat or chicken instead.

Ingredients:

  • ½ cup dry white wine
  • 1 ½ teaspoons saffron threads
  • 1-2 tablespoons coconut or olive oil
  • 1 cup diced yellow onion
  • 3 cups chopped tomatoes
  • 4 garlic cloves, minced
  • 2 cups shitake or sliced cremini mushrooms
  • 1 cup uncooked quinoa
  • 2 cups vegetable broth
  • 1-2 teaspoons sea salt
  • 1 teaspoon freshly ground pepper
  • 3 cups baby spinach
  • 12 ounces peeled cooked shrimp

Preparation:

  • Combine wine and saffron in a small bowl and let stand until ready to use.
  • Heat oil in a large skillet over low-medium heat.  Add tomatoes, onion and garlic and cook, stirring often until fragrant, about 7-9 minutes.  
  • Add mushrooms to skillet.  Cook, stirring often, until mushrooms release juices, about 3-5 minutes.
  • Add wine-saffron mixture to skillet and bring to a boil, stirring constantly, about 2 minutes.  Add quinoa and while stirring occasionally, cook until liquid is reduced by half, about 3 minutes.
  • Add vegetable broth, salt and pepper to skillet.  Stir well and reduce heat to low. Cover and cook until quinoa is almost tender, about 20 minutes.
  • Gently stir spinach into paella and add the shrimp.  Cover and cook until shrimp is heated through, about 3-4 minutes.
  • Serve immediately and enjoy!

Banana Oatmeal Smoothie

Makes 1-2 servings

This smoothie is packed with fiber, healthy fats and protein and will lay a great foundation for your day by keeping you satisfied for hours!  This smoothie is also perfect to add in a little bit of green with avocado or spinach.  The avocado will make the smoothie even creamier and neither the avocado or the spinach will change the taste at all. 

Ingredients:

  • 1 ripe banana
  • 1/3 cup old-fashioned oats 
  • ½ cup organic plain yogurt (I used organic Wallaby)
  • ¾ cup unsweetened organic almond milk
  • 1 tablespoon chia seeds
  • 1 tablespoon ground flaxseeds
  • 1 tablespoon hemp seeds
  • 2 tablespoons almond butter
  • ½ teaspoon vanilla extract
  • 2 teaspoons honey or 2-3 Medjool dates
  • ½ teaspoon ground cinnamon
  • 1 tablespoon flaxseeds
  • 3-4 ice cubes
  • ½ avocado (optional)
  • ½ cup spinach (optional)
  • chopped walnuts (optional)

Preparation:

  • Add all smoothie ingredients to high-powered blender and blend until creamy and smooth. 
  • Sprinkle chopped walnuts on top. (Optional)
  • Enjoy! 

Gluten Free Pumpkin Bread

Makes 1 loaf

My daughter and I took a classic recipe for pumpkin bread and substituted some of the ingredients to make a "healthier version" by using a mix of almond and coconut flour instead of white flour and sweetened it naturally using maple syrup and honey instead of regular sugar.  We also added our "signature topping" using crushed chopped walnuts and pecans. It came out super moist, fluffy and delicious!  You can store it in the refrigerator for about a week, or slice and freeze and then defrost individual slices, by either letting them rest at room temperature or warm in the toaster. 

Ingredients:

  • 1 cup almond flour
  • ¼ cup coconut flour
  • 4 eggs
  • ¾ cup pumpkin puree
  • 1 tablespoon cinnamon
  • ½ teaspoon pumpkin pie spice
  • ¼ teaspoon sea salt
  • 1 teaspoon baking soda
  • 1 teaspoon vanilla
  • ¼ cup maple syrup
  • 1 tablespoon honey
  • ¼ cup coconut oil (I melted it in a saucepan on the stove)

For the topping:

  • ¼ cup chopped walnuts
  • ¼ cup chopped pecans
  • 3 tablespoons coconut sugar (use more of less depending on how sweet you want it)
  • 2-3 tablespoons almond flour
  • 3-4 tablespoons coconut oil (melted)

Preparation:

  • Preheat oven to 325 degrees.
  • Combine all dry ingredients in a bowl.
  • Combine all wet ingredients in another bowl.
  • Pour the wet ingredients into the dry ingredients and mix until well combined.
  • Pour batter into a greased 9 x 5 inch loaf pan.
  • Combine topping ingredients in a separate bowl until it reaches a crumble consistency.  
  • Top the loaf with the crumble topping and bake for 50-55 minutes.
  • Enjoy!

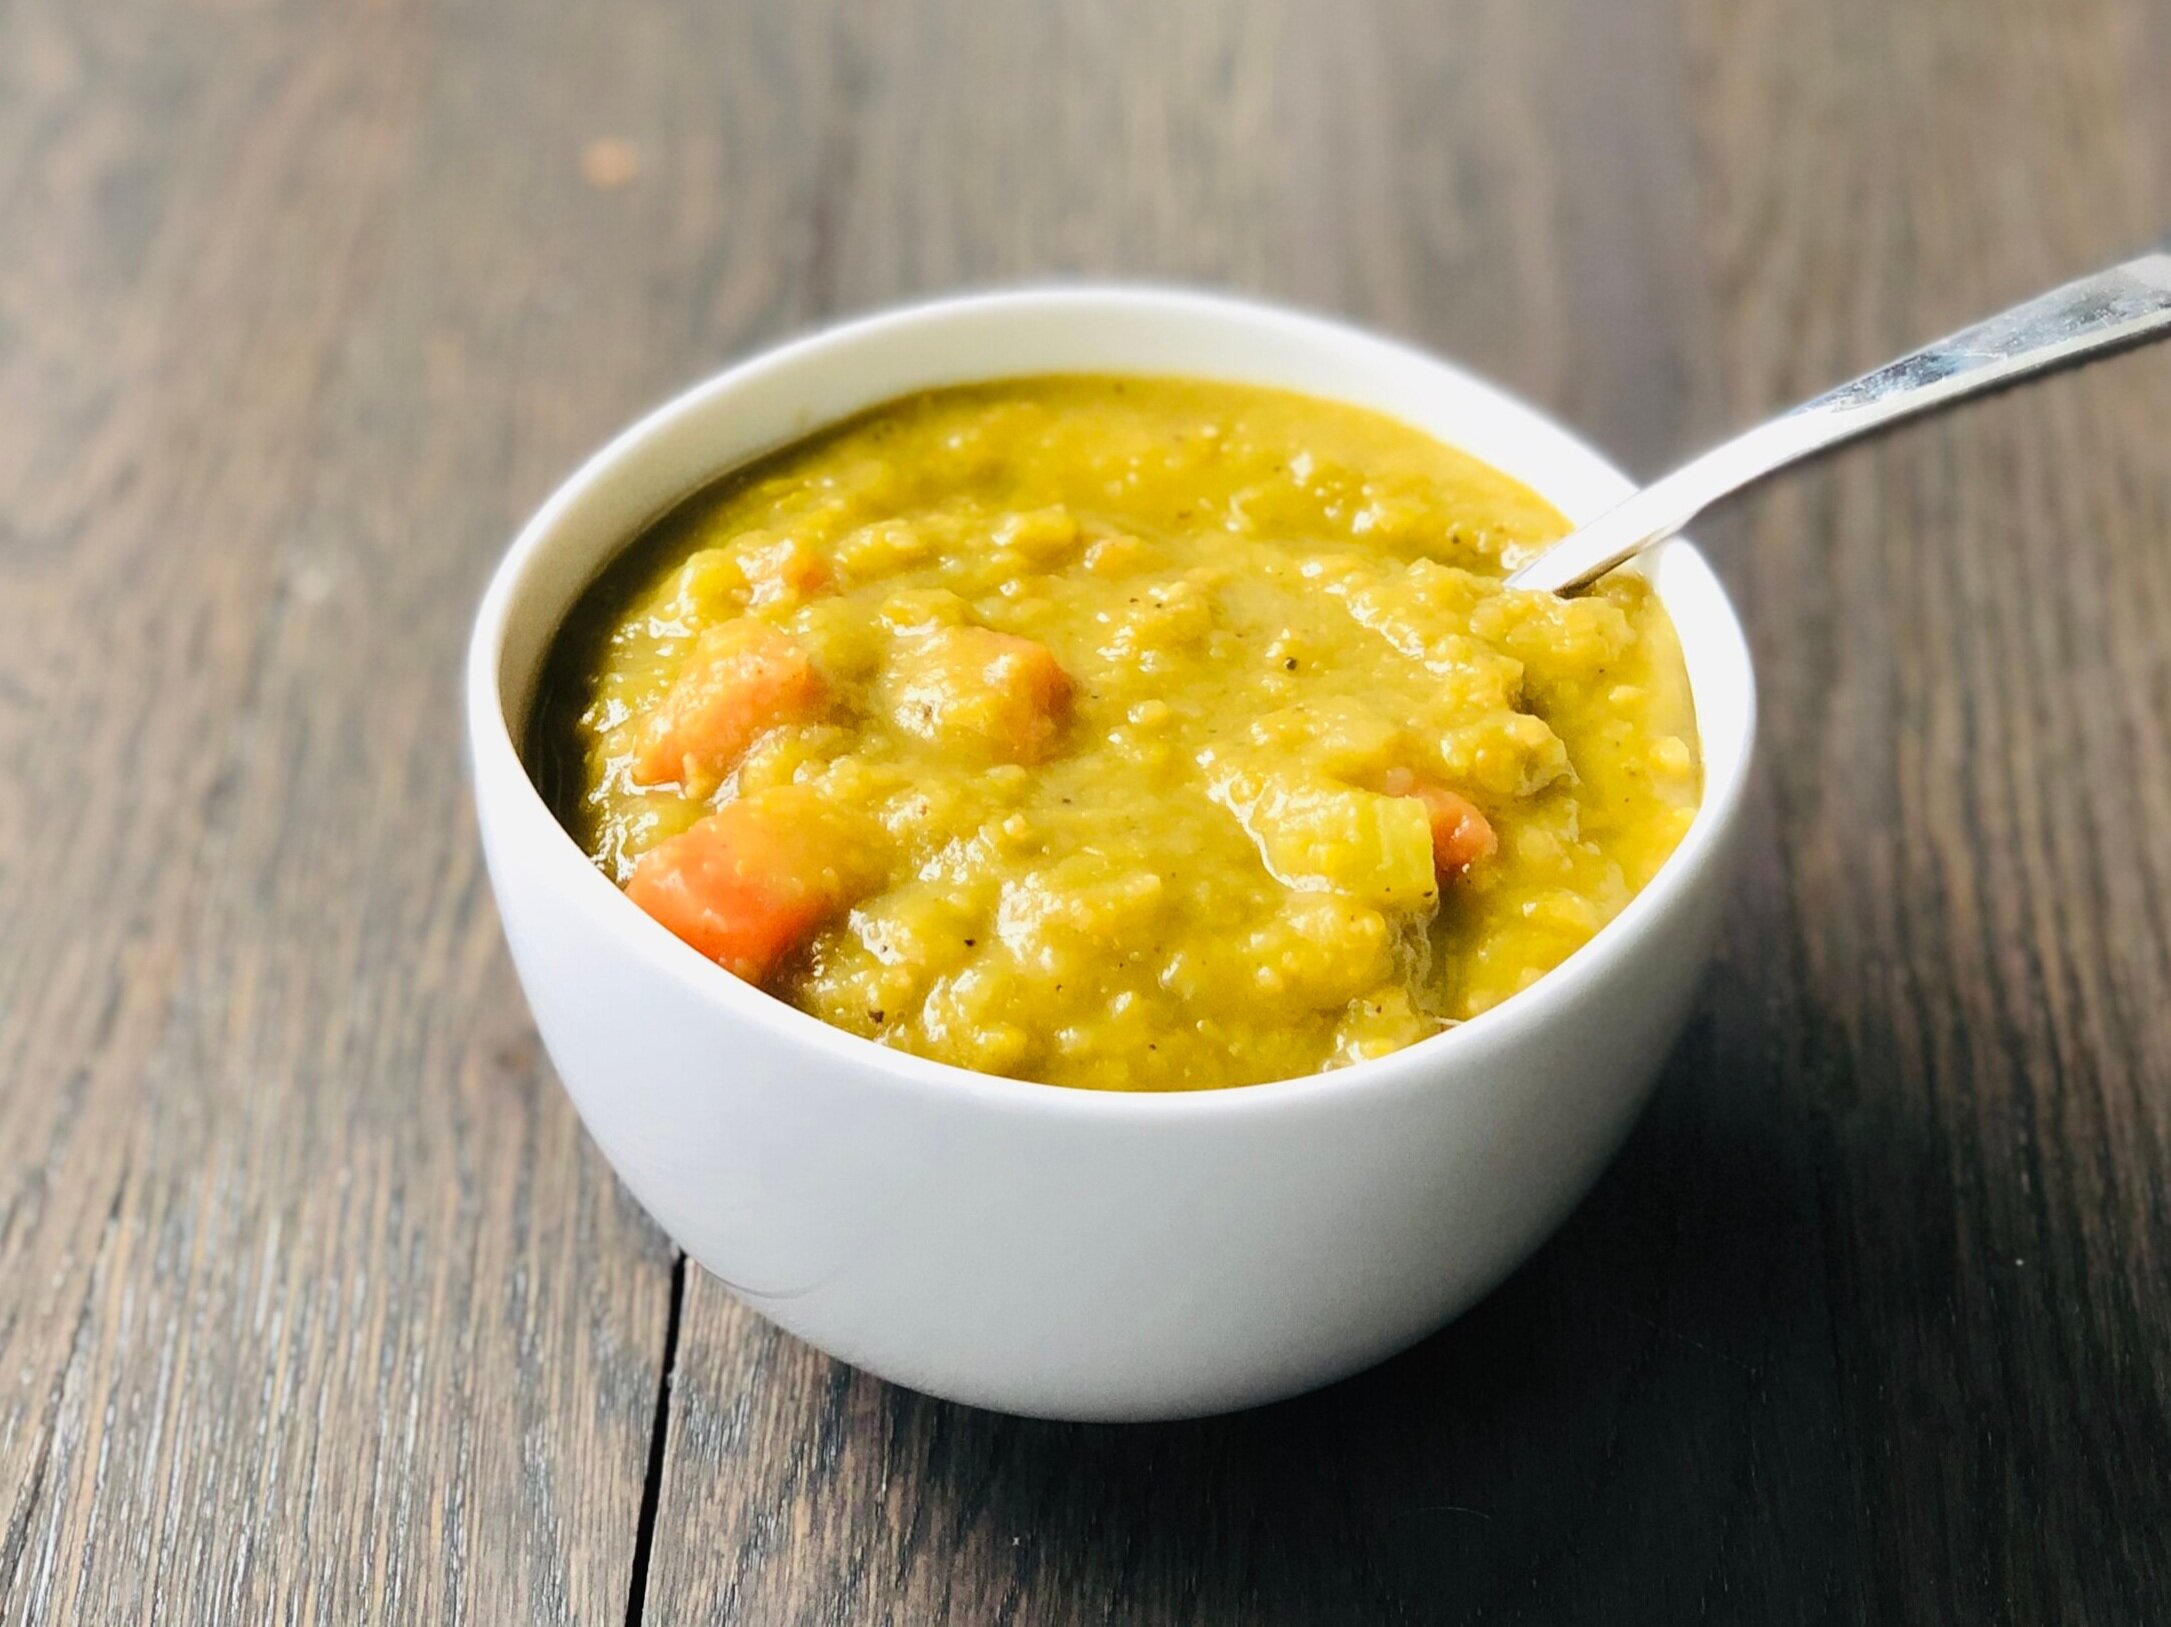
Split Pea Soup

Split+Peas+Soup+New.jpg

Serves 6

This amazing recipe is a slightly adapted version of Ina Garten’s and it’s the first soup I learned to make.  It’s still one of my all time favorites! It’s delicious and super easy to prepare!  The healthy ingredients yield a nutrient-dense meal filled with dietary fiber, which keeps you full, potassium, which supports metabolism and helps regulate blood pressure and vitamin K, which maintains your health by helping your body respond to injury.  I love to freeze leftovers in glass mason jars in serving sized portions for quick family meals.  You can view the original recipe here:  http://www.foodnetwork.com/recipes/ina-garten/parkers-split-pea-soup-recipe.html 

Ingredients:

  • 1/8 cup olive oil

  • 2 cloves garlic, minced

  • 1 cup chopped yellow onion

  • 2 cups chopped carrots (3-4 carrots)

  • ½ teaspoon dried oregano

  • 2 teaspoons sea salt or kosher salt

  • 1 teaspoon freshly ground pepper

  • 1 cup diced parsnip

  • 10 cups Chicken or Vegetable Broth

  • 1 pound dried split green peas

  • Parsley for garnish (optional)

Preparation

  • Place olive oil into a large 4 or 6 quart Dutch oven and set over medium heat. Once hot, add the onion, garlic, oregano, salt and pepper and sweat until onions are translucent, approximately 10-15 minutes.

  • Add the carrots, parsnip, ½ pound of the split peas and chicken stock. Bring to a boil, then simmer uncovered for 45 minutes.

  • Add remaining split peas and continue to simmer for another 45-60 minutes, or until all the peas are soft. Stir frequently to keep the solids from burning on the bottom.

  • If you prefer your soup thinner you can add a little more stock.

  • Add more salt and pepper to taste.

  • Garnish with parsley (optional) and enjoy!

Sweet Potato Casserole with Pecan Crumble Topping

sweetpotatoe.JPG

Yields 10 servings

My family begs me to make this recipe for every holiday throughout the year, especially Thanksgiving. Sweet potatoes are so delicious and so good for you!   This recipe is super easy to prepare and tastes way more like a dessert than a side dish.  And the pecan crumble topping is ridiculous! Give it a try and I promise it will become a favorite in your house too!

Ingredients

For the filling:

  • 4 cups mashed sweet potatoes (about 4-5 medium sized potatoes)

  • ¼ cup organic coconut sugar

  • 2 tablespoons maple syrup

  • 2 eggs beaten (preferably pasture-raised)

  • ½ cup milk (I use unsweetened almond or coconut milk but you can use whatever you like)

  • ½ teaspoon salt

  • 1/4 cup melted organic grass-fed butter or ghee

  • 1 teaspoon vanilla extract

For the topping:

  • 1 cup organic coconut sugar

  • ½ cup all-purpose flour (use almond flour or other gluten-free flour to make gluten-free)

  • 1/3 cup organic grass-fed butter or coconut oil

  • 1 1/2 cups chopped pecans

Preparation:

  • Roast sweet potatoes at 400 degrees for about 45-50 min or until soft. Remove from oven and let cool. When cool enough to handle, scoop inside of sweet potatoes into a large mixing bowl. Combine with coconut sugar or maple syrup, eggs, milk, salt, butter and vanilla. Mix together and pour into a greased 13x9 inch-baking dish.

  • To prepare the topping, in a separate bowl combine the coconut sugar, flour, melted butter or coconut oil and pecans. Mix together and crumble over sweet potato mixture. Bake uncovered at 350 degrees for 35 to 45 minutes.

  • Enjoy!

Roasted Butternut Squash Soup

Serves 4

Soup season is officially upon us and not only does soup hit the spot on a cold day, it’s also one of the easiest things you can make for dinner.  This super creamy (yet cream-less) roasted butternut squash soup is a slightly adapted version from Cookie and Kate and it’s by far the best butternut squash soup I’ve ever tasted and incredibly simple to make!  Butternut squash is one of the most nutritious and healthiest vegetables you can eat, with a rich array of vitamins, minerals, antioxidants as well as lots of fiber - and it's super filing too!  You can see the original recipe here: http://cookieandkate.com/2015/roasted-butternut-squash-soup/

Ingredients:

  • 1 large or 2 smaller butternut squash, halved vertically with seeds removed
  • 1 – 2 tablespoons coconut oil
  • 1-tablespoon olive oil
  • ½ cup chopped shallot
  • 1 ½ teaspoons salt
  • 3 garlic cloves minced
  • 1/8-teaspoon ground nutmeg
  • Freshly ground pepper to taste
  • Up to 4 cups vegetable broth
  • 1-2 tablespoons butter (you can substitute olive oil for dairy free/vegan soup)
  • Parsley for garnish (optional)

Preparation: 

  • Preheat oven to 425 degrees and line a rimmed baking sheet with parchment paper.  Rub each half of the butternut squash with coconut oil to lightly coat the squash on the inside.  Sprinkle it with salt and pepper.
  • Turn the squash face down on the baking sheet and roast until it is tender and completely cooked through, about 45 to 50 minutes. Set the squash aside until it’s cool enough to handle, and then use a large spoon to scoop the butternut squash flesh into a bowl and discard the skin.
  • Next, in a large soup pot, warm 1 tablespoon olive oil over medium heat until shimmering. Add the chopped shallot and 1 teaspoon salt. Cook, stirring often, until the shallot has softened and is starting to turn golden on the edges, about 3 to 4 minutes. Add the garlic and cook until fragrant, about 30 seconds, stirring frequently. 
  • Now add the reserved squash to the pot, then add 3 cups of the vegetable broth, nutmeg and a few twists of freshly ground black pepper. Bring the mixture to a simmer and cook, stirring occasionally, for 15 to 20 minutes so the flavors have a chance to meld.  Then use your immersion blender to blend the soup completely. Then add 1 to 2 tablespoons butter or olive oil, to taste, and blend again. If you want your soup thinner add more vegetable broth.  Taste and blend in more salt and pepper, if necessary.  Pour soup in individual bowls, top with a little more black pepper and parsley (optional) and enjoy!
  • To store leftover soup, let it cool completely before transferring it to a proper storage container and refrigerate for up to 4 days (leftovers taste even better the next day!) Or, freeze this soup for up to 3 months.

Homemade Peanut Butter M&M's

 Makes about 50 M&M’s

These homemade peanut butter M&M’s are made with pure goodness!  They are sweet, salty, slightly crunchy and WAY better than the original!  Go ahead and indulge in these delicious treats, you and your family will love them! This slightly adapted recipe is courtesy of Minimalist Baker.  You can see the original recipe here: http://minimalistbaker.com/homemade-peanut-butter-mms/

Ingredients:

  • ¼ cup rolled oats (I used gluten free oats)
  • 2 pitted Medjool dates
  • ½ cup raw almonds
  • ½ cup roasted peanuts
  • ½ cup roasted, salted peanut butter
  • 1 cup (8 ounces) dark chocolate 

Preparation:

  • Line a large cookie sheet with parchment paper.
  • Mix oats in food processor until small pieces remain.  Add dates to the oats and mix until all pieces are small.  Remove mixture from food processor and set aside.
  • Next add the peanuts and almonds to food processor and mix until they turn to meal consistency.  Then add the peanut butter to the nut meal and pulse until well combined.  Next add date and oat mixture and process until it forms into a loose dough.  If it seems too wet to handle, add more oats.  If it seems too dry, add a couple more dates.
  • Scoop out the dough and form into small round balls -- about ½ teaspoon each.  Place on the parchment-lined cookie sheet and pop in the freezer to harden for about 30 minutes.
  • After 30 minutes, melt the dark chocolate over a double boiler.  Then take dough balls out of freezer and work in small batches to coat the balls.
  • To coat, dip a few balls into the chocolate at a time, flip until coated and then pick up with a fork and tap on the rim of the bowl to remove excess chocolate.  Place the balls back on the parchment-lined cookie sheet and put back into the freezer to set.
  • Repeat until all peanut butter balls are dipped and coated.  If the chocolate becomes too firm just re-warm it as needed .
  • When set, remove peanut butter M&M’s from freezer and store in an air-tight container.
  • Enjoy!